


 ×
×
How To Make A Wig: Beginners Guide
Last updated May.06,2023
Do you think buying a high-quality wig is too expensive? Why not try making a wig yourself? You are a beginner and don't know how to start, it's okay. Don't worry, this article will detail how to make a wig yourself.
What you will learn from this article
1.How To Make A Wig By Hand?
2.Benefits Of Making A Wig By Yourself

How To Make A Wig By Hand?
In this section, we will provide a detailed introduction to the steps of making your own wig at home. Please follow us to learn.
Step 1: Take measure
Firstly, we need to measure the head circumference around the hairline.
In this measurement process, it is best to choose a soft ruler for measurement, so that the measurement results are accurate and do not harm our scalp.
Starting from the hairline behind the neck, wrap it around the hairline before the forehead. The circle measured by the tape should be above the ear. When determining the specific number, do not tighten the tape measure too tightly. This will result in inaccurate measurement and may cause deformation of the tape measure, which may affect future use. Therefore, we should stick the tape measure flat on the scalp instead of tightening it.
Secondly, we need to measure the head circumference of another dimension.
We need to align the end of the tape with the hairline in the middle of our forehead, then extend the tape to the top of our head, and then naturally drop the tape to the neck to align with the hairline at the back of the neck for measurement.
During this process, just like in the previous stage, do not forcefully pull the tape, so that it is naturally flat on the scalp for measurement.
Finally, what we need to measure is the head circumference between the ears.
We should place the end of the tape measure where the ear and head are connected, and then extend the tape measure around the head to the same position as the other ear for measurement.
If you are not very clear about the described position, it is actually the position where we place the glasses frame on our ears when wearing glasses. I hope this explanation will help you understand. And just like before, don't forcefully pull the tape, just measure it flat.
Step 2: Mark the measurements on the head mold
Measure the circumference of the head, the height of the head, and the distance between the two ears that we measured in the first step on the prepared head mold using a soft ruler, and then mark the starting position with a marker.
Step 3: Fix the cotton tape and lace on the head mold
Carefully fix the prepared cotton tape onto the head mold with small nails according to the marks marked in the previous step, taking care not to break the cotton tape.
After fixing the cotton strap, we choose a large piece of cotton lace that can cover the entire head, and then wet the cotton lace because the wet cotton lace will better shape. We will lay the wet lace flat on the head mold and fix it in place. After fixing, sew the cotton lace onto the cotton tape.
Step 4: Try on foundation
After we sew the foundation, we can remove all the fixing nails and try the size of the foundation on our head to see if it fits properly. If it is not suitable, fix it back onto the head mold for adjustment. If appropriate, cut off the excess lace edges.
Step 5: Prepare the hair
We can choose human hair wig or synthetic hair wig for production. If you want to wear it for a long time and want a more natural wearing effect, human hair will be a better choice. If you wear it less frequently and do not have too many requirements for the texture of your hair, synthetic hair will be a better choice.
Compare the hair extension we prepared in advance with the foundation on the head mold, and cut the length that is suitable for the measured head circumference.
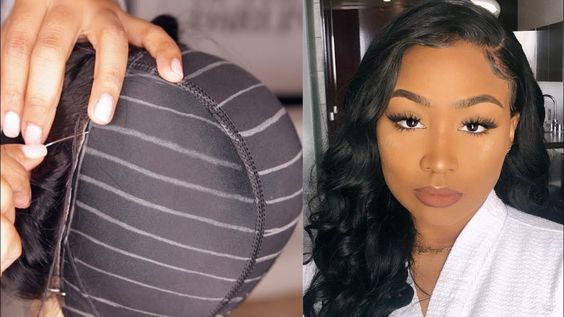
Step 6: Start sewing
Firstly, we start from the hairline at the back of the neck towards the hairline before the forehead along the circumference of the head mold. On a cotton lace, we start drawing lines around the circumference of the head mold in units of approximately two fingers wide, and so on until we reach the hairline before the forehead.
After drawing we can start sewing along these lines. Let's start sewing from the bottom, which is the hairline at the back of the neck. We first flatten the needle and thread, then tie two knots at one end to fix it. We sew the first hair extension along the pre drawn hairline, and then repeat the previous knotting action when sewing to the other end. By analogy, stitch the remaining hair extensions along the marked lines, and then cut off the excess parts.
Benefits Of Making A Wig By Yourself
Why do so many people choose to make their own wigs? Because making your own wig has many benefits, the following will explain it from three points.
Save money
We all know that buying a high-quality wig, especially a high-quality human hair lace wig, in the market now costs a lot of money. But if we choose to make it ourselves, we can save ourselves a lot of money because the materials we use when making it are much cheaper than purchasing a wig directly.
Tailored
There are many wig merchants which can customize now, but sometimes the customized products always deviate from what we want. But when making a wig yourself, you can completely follow the way you want it to be made, regardless of the size, length, or color of the hair cap. However, if the difficulty of creating a hairstyle is too high for us to make it ourselves, we can still choose to purchase a wig.
Save time
When we need to customize a wig, the wig factory often requires more production time to make the wig we need, especially if we catch up with shopping festivals and other festivals with large shipments, the production cycle will be even longer. So when we want to save this long waiting time, we can choose to make our own wig ourselves.

Ending Word
Making a wig yourself is not as difficult as you imagine. As long as you have enough patience, you can definitely do it. Please believe in yourself.